Windows 10 / Windows 11

Hier ist eine sechsschrittige Anleitung zur Installation von TensorFlow in Jupyter Notebook, sowohl in Deutsch als auch in Englisch, für Ihre WordPress-Seite:
Deutsch:
- Miniconda installieren: Laden Sie Miniconda3 für Windows von der Miniconda-Website herunter und installieren Sie es.
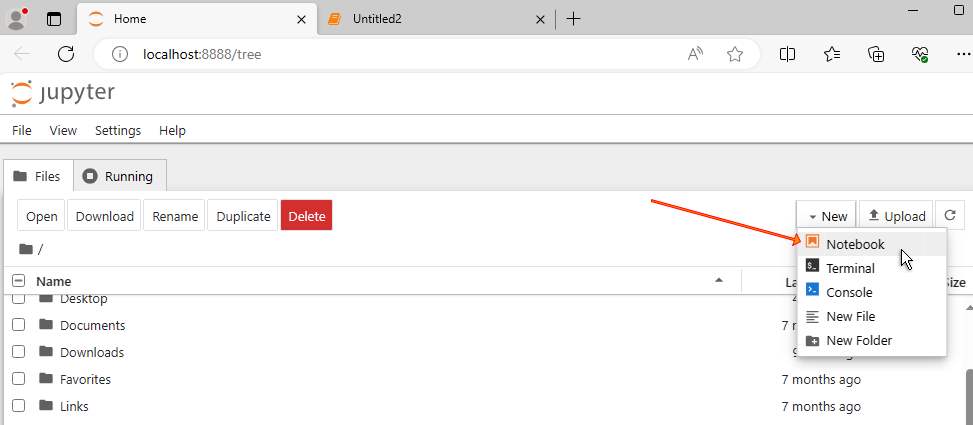
- Jupyter Notebook installieren: Öffnen Sie das Miniconda-Terminal und geben Sie
conda install jupyterein. - Jupyter Notebook starten: Geben Sie im Miniconda-Terminal
jupyter notebookein. - TensorFlow installieren: Fügen Sie in einem Jupyter-Notebook-Zellblock
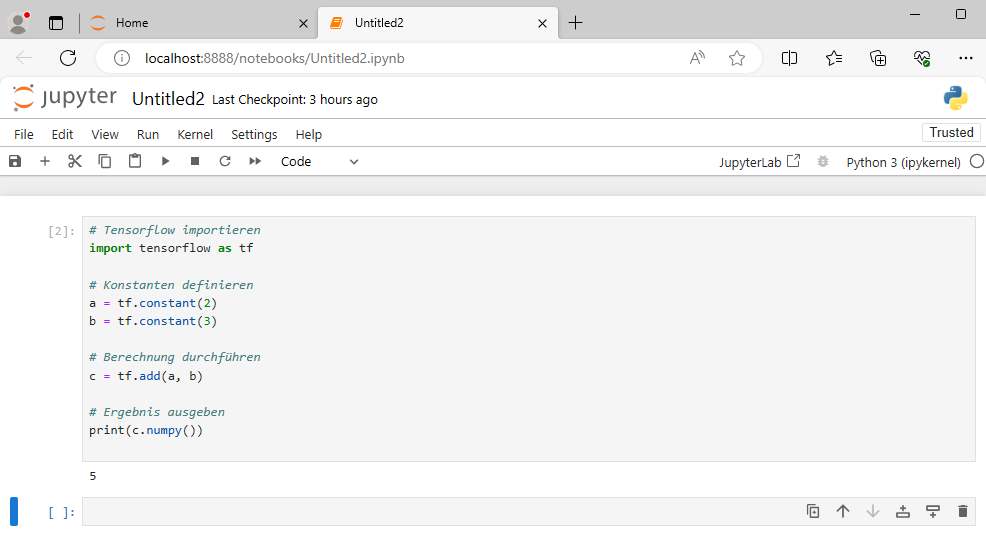
!pip install tensorflowein. - TensorFlow testen: Schreiben Sie einen Testcode in Jupyter Notebook:
   import tensorflow as tf
   a = tf.constant(2)
   b = tf.constant(3)
   c = tf.add(a, b)
print(c.numpy())- Eigene Umgebung für TensorFlow erstellen: Erstellen Sie eine dedizierte Python-Umgebung für TensorFlow mit Conda oder virtualenv (optional, aber empfohlen).
English:
- Install Miniconda: Download Miniconda3 for Windows from the Miniconda website and install it.
- Install Jupyter Notebook: Open the Miniconda terminal and enter
conda install jupyter. - Launch Jupyter Notebook: In the Miniconda terminal, type
jupyter notebook. - Install TensorFlow: In a Jupyter Notebook cell, input
!pip install tensorflow. - Test TensorFlow: Write a test code in Jupyter Notebook:
   import tensorflow as tf
   a = tf.constant(2)
   b = tf.constant(3)
   c = tf.add(a, b)
print(c.numpy())- Create a Dedicated Environment for TensorFlow: Set up a specific Python environment for TensorFlow using Conda or virtualenv (optional but recommended).